Secrets To Creating Gluten-Free Bread Crumbs
Secrets To Creating Gluten-Free Bread Crumbs
Choosing the Right Gluten-Free Bread
The quest for the perfect gluten-free bread crumb usually begins with selecting the right loaf.
Choosing between contemporary and stale gluten-free bread is essential for attaining the desired texture in your crumbs. Fresh bread, while appealing, tends to provide bigger, less crisp crumbs that may clump together.

Stale bread, however, presents a superior crumb construction. Its drier consistency allows for simpler crumbling and ends in smaller, extra uniformly sized pieces.
The type of gluten-free bread additionally matters significantly.
Those made primarily from rice flour usually produce fine, nearly powdery crumbs, perfect for breading delicate items.
Bread incorporating almond flour or other nut flours will yield coarser, extra substantial crumbs, good for topping casseroles or adding texture to meatloaf.
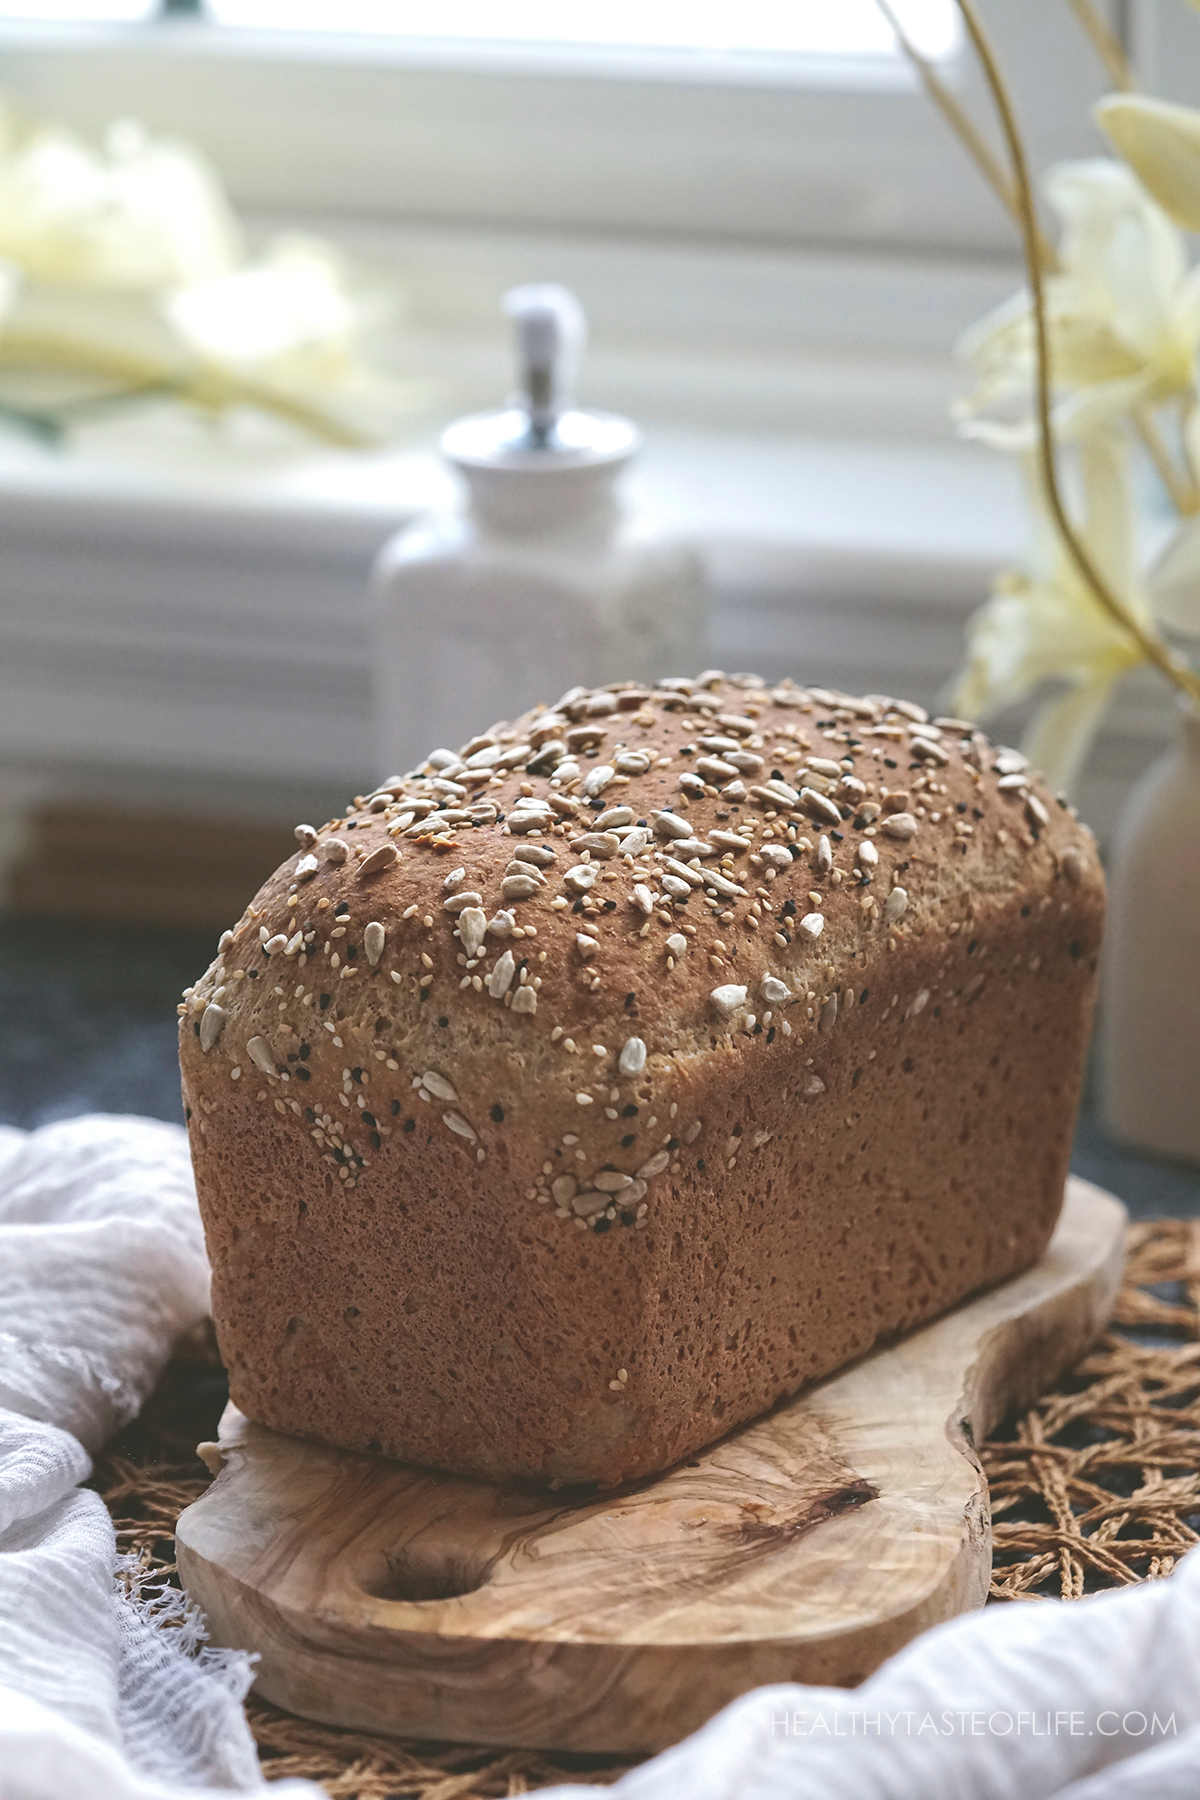
Bread with added seeds or grains will create crumbs with attention-grabbing visible and textural variations, helpful for creating a country, artisanal look.
Experimentation is essential.
Try completely different gluten-free bread brands and varieties to discover which most intently fits your crumb wants.
Consider the ingredients listed on the packaging.
A higher proportion of starch-based flours will generally result in finer crumbs, while a higher proportion of protein-rich flours will yield coarser crumbs.
Here’s a breakdown of bread varieties and their crumb potential:
-
Rice Flour Bread: Produces nice, powdery crumbs.
-
Almond Flour Bread: Yields coarse, substantial crumbs.
-
Cassava Flour Bread: Creates mild and ethereal crumbs, good for coatings.
-
Tapioca Flour Bread: Similar to Cassava, provides gentle and delicate crumbs.
-
Potato Starch Bread: Results in finer crumbs, often used in breading functions.
-
Multigrain Gluten-Free Bread: Offers a mixture of textures and sizes, best for a more rustic look.
Once you have selected your bread, the drying process is equally essential.
Allowing the bread to stale naturally is the simplest method. This normally takes 1-3 days at room temperature, relying on humidity and loaf density.
For faster results, you’ll have the ability to cube the bread and bake it in a low oven (around 250°F or 120°C) for 15-20 minutes, or till fully dried but not browned.
Alternatively, you presumably can course of the bread in a food processor to create crumbs instantly, then unfold them on a baking sheet and dry them within the oven.
Remember to examine the crumbs periodically, preventing burning.
Finally, contemplate storage.
Store gluten-free bread crumbs in an hermetic container in a cool, dry place to maintain freshness and forestall them from turning into soggy.
By paying shut consideration to bread choice, the drying method, and storage, you’ll have the ability to constantly produce high-quality gluten-free bread crumbs for all of your culinary creations.
Don’t be afraid to experiment! The good crumb is ready to be discovered.
While the article’s title focuses on crumbs, understanding gluten-free bread types is essential for reaching the desired crumb structure. Different gluten-free flours and baking methods yield vastly completely different results.
The quest for the proper gluten-free bread crumb begins with deciding on the suitable bread base. Many gluten-free breads depend on a blend of starches and flours, rather than a single ingredient.
Common gluten-free flours include:
-
Rice Flour: Often used as a filler, it contributes to a lighter crumb however can lead to a barely dry texture if used alone.
-
Corn Flour (Cornstarch): Provides a soft, tender crumb, but lacks structure and may lead to a gummy texture except balanced with other ingredients.
-
Potato Flour: Adds moisture and a barely gummy texture; wants careful mixing with different flours.
-
Tapioca Flour/Starch: Creates a light-weight and ethereal crumb, however much like cornflour, wants support from different flours for structure.
-
Sorghum Flour: Offers a barely nutty taste and a few structure but can lead to a dense loaf if not rigorously balanced.
-
Almond Flour: Adds a delightful nutty flavor and some binding power, but it’s normally combined with different flours to stop a crumbly loaf.
-
Buckwheat Flour: (Technically gluten-free, but can be cross-contaminated) Adds a singular earthy flavor and good binding properties.
-
Coconut Flour: Very absorbent, requires a higher liquid ratio. It adds moisture and a slightly candy style, however could make the loaf dense if not mixed appropriately with different flours.
Beyond single flours, commercially out there gluten-free bread mixes typically incorporate a mix of these starches and flours, along with xanthan gum or guar gum, which act as binders to imitate the elasticity of gluten.
The type of gluten-free bread additionally influences crumb structure:
-
Sandwich Bread: Typically aims for a gentle, relatively even crumb, often achieved through a mix of rice flour, tapioca starch, and potato starch, with added binders. This may find yourself in a tighter crumb than different varieties.
-
Artisan-style Breads: These usually prioritize texture and flavor, incorporating a greater diversity of flours such as almond flour or sorghum flour. They might have a more open crumb structure, however usually require more experience to bake efficiently.
-
Sourdough Gluten-Free Bread: The fermentation process in sourdough can enhance the feel and crumb development in gluten-free bread, providing a more open and ethereal crumb, similar to traditional sourdough. This requires a longer course of and cautious attention to the sourdough starter.
Achieving a great crumb in gluten-free bread necessitates experimentation. Pay shut consideration to the recipe’s instructions concerning hydration and baking occasions. Underbaking will lead to a gummy interior, whereas overbaking will result in dryness.
Finally, the equipment used can even considerably affect the crumb. Using a great quality baking pan and maintaining consistent oven temperature are crucial for a more even crumb structure.
The “secrets” to creating optimum gluten-free bread crumbs usually are not singular, however somewhat a mixture of flour choice, careful recipe following, and an understanding of the restrictions and prospects of gluten-free baking.
Achieving the right gluten-free bread crumb is a quest many residence bakers undertake. Unlike gluten-containing breads, which rely on gluten’s elasticity for structure, gluten-free loaves require careful ingredient choice and method.
The first step lies in choosing the right gluten-free bread mix or creating your personal mix from scratch. Pre-made mixes often contain a big selection of starches (tapioca, potato, rice), flours (brown rice, almond, tapioca), and binding brokers (xanthan gum, guar gum).
Pay shut attention to the ingredient record. A higher proportion of starchy flours, like tapioca or potato starch, contributes to a lighter, crispier crumb, whereas a higher proportion of rice flour might lead to a denser, chewier texture. Experimenting with different ratios is vital to discovering your best crumb.
The type of leavening agent additionally performs a crucial role. Baking powder and baking soda provide lift, but an extreme amount of can create a crumb that is overly ethereal and susceptible to crumbling.
Beyond the components, the hydration degree is paramount. Too much liquid results in a gummy interior and a soggy crumb, whereas too little can create a dry, hard crumb. Follow the recipe meticulously, or use a kitchen scale for precise measurements.
Mixing method is one other crucial factor. Overmixing develops gluten-like structures in gluten-free doughs, resulting in a tough crumb. Gentle mixing till simply mixed is good. Avoid kneading altogether.
The baking course of itself considerably impacts crumb structure. Proper oven temperature is essential; too low, and the bread will be dense; too excessive, and it will burn earlier than the inside is fully cooked. Baking time additionally requires cautious monitoring, doubtlessly varying primarily based on your oven and the precise recipe.
For achieving a crispier crumb, consider including a final touch like brushing the highest of the loaf with milk or egg wash before baking. This can contribute to a beautiful golden-brown crust and enhance the crispiness.
After baking, allow the bread to chill utterly on a wire rack. This prevents extra moisture from turning into trapped throughout the bread, leading to a softer, less crisp crumb. Proper cooling is essential for maintaining crumb texture over time.
Beyond the baking course of itself, consider the storage of your gluten-free bread. Store it in an airtight container at room temperature for optimal freshness. Freezing is one other glorious option to extend its lifespan, guaranteeing that the bread retains its crumb structure for longer durations.
Experimenting with different flours, starches, and liquids is part of the journey to mastering gluten-free bread crumb texture. Keep detailed notes in your baking endeavors, noting which combinations produce your most well-liked outcomes. Each oven and recipe will differ slightly, necessitating some personalized experimentation.
Finally, do not neglect that even with essentially the most exact strategies, gluten-free bread will naturally have a unique crumb construction than its gluten-containing counterpart. Embrace the unique texture and character of gluten-free bread, specializing in achieving a crumb that meets your individual preferences, whether you need a light-weight and ethereal texture or a extra dense and chewy one.
Don’t be discouraged by initial failures. The path to perfecting gluten-free bread crumb texture is a strategy of studying, adapting, and experimenting. The rewards of a delicious, satisfying gluten-free loaf are properly well value the effort.
Making the Crumbs
Achieving the proper gluten-free bread crumb texture is crucial for reaching optimal leads to recipes calling for them. The key lies within the pulverizing technique, and a meals processor and blender offer distinct advantages and disadvantages.
Food processors, with their sharp, strong blades and sturdy building, excel at creating coarser or finer crumbs relying on pulse period and blade sort. For reaching a rough crumb, perfect for topping casseroles or breading thicker cuts of meat, a number of quick pulses are all that is wanted. The sturdy design handles even the hardest gluten-free bread, stopping jamming that can happen with softer bread in a blender.
Conversely, longer pulsing permits for a finer crumb, excellent for coating delicate foods or including to meatballs for texture. The capability to easily control the processing time offers a degree of precision that can’t all the time be achieved with a blender. The bowl’s extensive opening makes including the bread and achieving even processing easier.
Blenders, however, provide their own benefits. High-powered blenders can produce an extremely fine, virtually powder-like crumb perfect for thickening sauces or including to baked goods where a seamless texture is desired. Their velocity and power can rapidly break down the bread, especially if utilizing stale or dried gluten-free bread.
But this very energy can be a double-edged sword. Over-processing is a standard issue, leading to a paste-like consistency instead of fascinating crumbs. The narrower opening can be difficult when adding giant quantities of bread, typically requiring a quantity of additions and pulsing. Additionally, cleansing a blender after making crumbs, significantly from sticky gluten-free bread, may be extra labor-intensive in comparison with a food processor.
The choice between a food processor and a blender actually is decided by the specified ultimate texture and the quantity of crumbs being made. For giant batches and various crumb sizes, the meals processor provides extra management and efficiency. For smaller portions and ultra-fine crumbs, a high-powered blender may be efficient, provided care is taken to keep away from over-processing. Consider also the type of gluten-free bread being used; drier, staler bread lends itself higher to mixing, while brisker bread would possibly require a meals processor to keep away from a pasty consistency.
Regardless of the chosen method, starting with completely cooled and barely stale gluten-free bread ensures better crumb formation. This reduces the best gluten free bread recipe bread’s moisture content material, stopping a gummy consistency during processing. Also, eradicating any hard crusts before processing ensures a uniform crumb texture.
Experimentation is vital to mastering gluten-free crumb making. Different brands and types of gluten-free bread will respond in another way to the identical processing method. Start with short pulses, whether utilizing a meals processor or a blender, and gradually increase processing time to attain the desired crumb dimension. Remember to all the time supervise the process to stop unintended over-processing.
Finally, remember that the ultimate aim is to create a crumb that enhances your recipe, not overpowers it. By understanding the strengths and weaknesses of every technique – the exact control of a meals processor versus the raw energy of a blender – you’ll achieve the proper crumb every time, making your gluten-free recipes actually shine.
Achieving the proper gluten-free bread crumb is a journey, not a vacation spot, demanding cautious consideration of ingredients and approach.
Start together with your bread base. Day-old gluten-free bread is good; its barely drier texture prevents overly sticky crumbs. Fresh bread will produce a mushier, less fascinating crumb.
The sort of gluten-free bread matters considerably. A denser, heartier loaf will yield coarser crumbs, appropriate for topping casseroles or coating meats. A lighter loaf will produce finer crumbs, excellent for breading delicate items or creating a fragile breading.
Pre-processing is vital. Remove any crusts, as they have an inclination to produce larger, tougher items that don’t mix nicely. You can use the crusts individually for other purposes like making croutons.
Food processors are your greatest friend. Pulse the bread in short bursts, checking regularly to avoid over-processing and creating bread mud. The goal is a consistent crumb dimension, not a nice powder.
For coarse crumbs, pulse fewer times. For fantastic crumbs, pulse more, but all the time monitor to stop pulverizing.
Alternatively, you presumably can achieve varying crumb sizes using a box grater. Use the massive holes for coarse crumbs and the smaller holes for finer crumbs. This is a extra labor-intensive method, but produces beautifully textured outcomes.
Consider including other ingredients to fine-tune your crumb texture. A tablespoon of rice flour might help to bind finer crumbs and prevent excessive stickiness. A touch of cornstarch can lend a lighter feel.
Drying the crumbs is essential, particularly for finer crumbs. Spread them thinly on a baking sheet and bake at a low temperature (around 250°F or 120°C) for 15-20 minutes, or till completely dry and crisp. This prevents clumping and ensures optimal texture.
Experimentation is paramount. Keep a notebook detailing your bread type, processing methodology, added ingredients, and baking time to refine your method and obtain your best crumb.
Don’t be afraid to deviate from the usual approach. Toasting the bread earlier than processing introduces a deeper flavor and a barely firmer crumb. Similarly, adding herbs or spices through the toasting part can infuse the crumbs with exciting aromas and tastes.
Store your completed crumbs in an airtight container in a cool, dry place. This ensures freshness and prevents them from becoming stale or absorbing moisture.
The measurement and texture of your gluten-free bread crumbs instantly influence the ultimate dish. Coarse crumbs add a pleasant crunch, while fantastic crumbs supply a fragile texture. Mastering crumb production is a ability that elevates your gluten-free baking and cooking.
Remember, the hunt for the perfect crumb is a personal one; your perfect could differ from others. Embrace the method, benefit from the experimentation, and savor the scrumptious outcomes of your efforts.
Ultimately, attaining the specified crumb size hinges on understanding your gear’s capabilities, controlling the processing time, and paying shut attention to the bread’s initial texture and moisture content. Happy Crumbing!
Achieving the proper gluten-free bread crumb hinges on meticulous management of moisture content.
Start with the best bread: A barely dry, but not stale, gluten-free loaf is right. Avoid overly soft or moist bread which can produce gummy crumbs.
Consider the bread’s recipe: Recipes with greater fat content material (from oils or eggs) will yield fattier, probably extra simply crumbled bread.
Pre-drying the bread is essential for attaining crispiness. Cut the bread into cubes and spread them in a single layer on a baking sheet.
Baking the bread cubes at a low temperature (around 200-250°F or 93-121°C) for a longer period (30-60 minutes, or even longer) is vital to even drying.
Regularly examine the bread cubes throughout baking. They must be utterly dry and simply crumble, not bend or flex.
Avoid overcrowding the baking sheet, as this will trap moisture and result in uneven drying and soggy crumbs.
A meals dehydrator presents a gentler, extra controlled method to drying. Use a low setting and monitor the bread often.
If using a dehydrator, thinner slices will dry quicker than thicker cubes.
Once dry, you’ll have the ability to further process the dried bread cubes in a food processor or blender. Pulse till you reach your desired crumb size and texture – fine, medium, or coarse.
For finer crumbs, use a higher-powered blender and blend until very fantastic. For coarser crumbs, pulse less regularly.
Sieving the crumbs after processing will take away any very fantastic dust and ensure a extra consistent crumb texture.
Store the completed crumbs in an airtight container in a cool, dry place. This prevents moisture absorption and maintains freshness for an extended interval.
Experiment with totally different gluten-free bread sorts to search out your favourite for bread crumbs. Some breads produce naturally crispier crumbs than others.
The addition of spices or herbs to the bread before drying can improve the flavour of the resulting crumbs.
Consider the meant use of the crumbs. For coating, fantastic crumbs are best. For topping casseroles or breadcrumbs, a coarser crumb works properly.
Proper moisture management is crucial to stop soggy or gummy crumbs. Over-drying can result in overly hard and dusty crumbs.
Using a thermometer to observe the interior temperature of the bread cubes during the drying process may help ensure full dehydration.
If your crumbs are too moist, return them to the oven or dehydrator for additional drying. If they’re too dry, pulse them in a meals processor to break up any exhausting pieces.
With follow, you’ll develop a really feel for the perfect moisture content material in your most popular type of gluten-free bread crumb.
Remember to at all times prioritize food security. Use clear gear and store the crumbs in a clear, dry container.
Flavor and Texture Enhancement
Gluten-free bread crumbs typically lack the satisfying texture and nuanced taste of their gluten-containing counterparts. Mastering their creation hinges on understanding tips on how to compensate for the lacking gluten community.
One essential factor is selecting the right base. Different gluten-free flours possess distinctive properties. Fine almond flour yields delicate crumbs, while coarser blends like a mix of rice flour and tapioca starch create a heartier texture.
Experimenting with the ratio of those flours is vital. Too much tapioca starch can result in overly gummy crumbs; an extreme amount of rice flour might result in dryness.
Consider adding binding brokers to enhance texture. Psyllium husk powder, xanthan gum, or flaxseed meal are excellent decisions, serving to to create a extra cohesive crumb that holds its form when toasted.
Proper toasting is paramount. Low and slow toasting in the oven ensures even browning and prevents burning, permitting for optimal improvement of taste complexity.
To elevate the flavor profile, contemplate incorporating herbs and spices. Dried herbs like oregano, thyme, or rosemary add an earthy, savory observe. Italian seasoning blend presents a flexible and aromatic choice.
For a bolder flavor, experiment with spices like smoked paprika for a smoky depth, garlic powder for a pungent kick, or onion powder for a delicate sweetness.
The addition of zest from citrus fruits corresponding to lemon or orange introduces a shiny, acidic counterpoint to the savory notes, brightening the overall taste experience.
Infusing the crumbs with flavorful oils earlier than toasting enhances both taste and texture. Olive oil, toasted sesame oil, or even a touch of melted coconut oil contribute richness and aroma.
Don’t underestimate the ability of salt. A pinch of salt enhances all other flavors, balancing the overall style profile and stopping blandness.
After toasting, allow the crumbs to chill completely earlier than storing. This prevents clumping and moisture retention, preserving their crisp texture and vibrant flavors.
For an additional layer of sophistication, consider incorporating finely grated Parmesan cheese or nutritional yeast for a savory, umami punch.
To obtain a consistently superior result, meticulously measure elements and adhere to the precise toasting temperature and time specified in your chosen recipe.
Experimentation is key. Don’t be afraid to regulate ratios, try new taste combinations, and tailor your recipe to personal preferences. Each experiment brings you nearer to perfecting your gluten-free bread crumb technique.
Keep in mind the supposed use of the crumbs. For a topping on casseroles, a coarser crumb works greatest. For breading, finer crumbs are preferable. This influences the ideal flour blend and toasting technique.
By mastering the methods of flour choice, binding, toasting, and flavor enhancement, you possibly can create gluten-free bread crumbs that rival their gluten-containing counterparts in both texture and taste.
Careful consideration to detail will elevate your gluten-free dishes, making them truly exceptional.
Gluten-free bread crumbs current a unique challenge: achieving the satisfying texture and refined taste complexity discovered in their gluten-containing counterparts. Mastering this requires a multifaceted method, focusing on both taste and textural enhancement by way of strategic ingredient additions.
One essential factor is the base itself. Instead of relying solely on gluten-free bread, think about incorporating other elements for enhanced flavor and texture. Potato flakes, as an example, present a slightly starchy and subtly sweet note, whereas adding a nice binding high quality to the crumbs.
Rice flour, another excellent base ingredient, offers a neutral flavor profile that allows different ingredients to shine. Combining rice flour with other starches like tapioca or arrowroot can further regulate the crumb’s texture, leading to a lighter or crispier end result depending on the proportions.
Nuts and seeds are invaluable tools in elevating each the taste and mouthfeel of gluten-free bread crumbs. Finely chopped almonds contribute a fragile sweetness and a lovely crunch, whereas walnuts supply a more strong, earthy flavor and a somewhat coarser texture.
For a richer, extra intense taste, consider incorporating pecans. Their buttery notes and substantial texture lend themselves superbly to breading functions. Alternatively, hazelnuts, with their distinctive nutty sweetness, offer a delightful twist on traditional bread crumbs.
Seeds provide a wide selection of textural and flavorful possibilities. Sesame seeds provide a mildly nutty taste and nice, slightly oily texture, whereas poppy seeds add a slightly sweet and crunchy component, visually enhancing the completed product.
Sunflower seeds, readily available and inexpensive, provide a subtle nuttiness and a satisfying crunch, making them an excellent addition. Pumpkin seeds, with their earthy and barely bitter notes, present a extra subtle and unique taste profile.
The key lies find the best balance. Overusing nuts or seeds can overpower the general taste, creating a dish that’s overwhelmingly nutty or overwhelming crunchy. Experimentation is vital to discovering the perfect ratio.
Beyond nuts and seeds, consider incorporating herbs and spices to additional enhance flavor complexity. Dried herbs like oregano, thyme, or rosemary can add depth and aroma, complementing the nutty notes of the seeds and nuts. A pinch of garlic powder or onion powder can add savory notes to complement each sweet and savory dishes.
Remember that the size of the nuts and seeds instantly impacts texture. Finely floor nuts and seeds lead to a smoother crumb, whereas coarsely chopped components yield a extra rustic and texturally fascinating end result. This permits for exact control over the final texture.
Finally, do not underestimate the influence of correct toasting. Toasting the bread crumb combination, together with the nuts and seeds, before using it helps to additional improve the flavor and create a crispier last product. This course of permits the ingredients to release their full taste potential and creates a deeper, more complex taste.
- Experiment with different nut and seed combinations to find your most popular taste profiles.
- Control the texture by adjusting the grind measurement of the nuts and seeds.
- Don’t be afraid to experiment with spices to add depth and complexity.
- Toasting the mixture is essential for optimum flavor and texture.
- Consider utilizing a meals processor for constant grinding and simpler blending.
Creating really scrumptious gluten-free bread crumbs requires a deep understanding of flavor and texture enhancement.
The key lies not just within the beginning components, but in the meticulous means of toasting.
Toasting intensifies the inherent flavors of the gluten-free bread, whether or not it’s created from rice flour, tapioca starch, almond flour, or a mix.
Subtle sweetness can be coaxed out from rice-based breads, while almond flour offers a distinct nutty undertone.
The process begins with choosing the proper bread.
A barely stale loaf works best; its moisture content is reduced, which permits for extra even toasting and prevents sogginess within the final crumbs.
Fresh bread is too moist and can doubtless steam somewhat than toast, resulting in uneven results.
Cutting the bread into cubes is the first step; small, uniform items ensure consistent toasting.
The measurement of the cubes determines the ultimate crumb texture; smaller cubes create finer crumbs, while bigger ones produce coarser crumbs.
The oven is the popular method for toasting, offering even heat distribution.
A low to moderate oven temperature (around 300-350°F or 150-175°C) is right; greater temperatures threat burning the crumbs earlier than they achieve the specified golden-brown color and enhanced taste.
Baking time is essential. Regular monitoring is essential; the colour deepens steadily, and a watchful eye prevents over-toasting, which may result in bitterness.
The best stage is achieved when the crumbs are crisp and lightly browned, exhibiting a nice aroma.
A dry skillet on the stovetop is an alternative for smaller batches, providing quicker outcomes and extra direct control.
However, be aware of potential scorching, especially if utilizing higher heat. Constant stirring is vital to ensure even toasting.
Once toasted to perfection, the crumbs ought to be fully cooled earlier than storing.
This prevents moisture build-up, which may lead to clumping or softening of the texture.
A fully airtight container is your greatest option; this prevents the crumbs from absorbing moisture from the air, maintaining their optimum crispness and flavor.
Flavor enhancements could be built-in earlier than or after toasting.
Adding herbs like rosemary or thyme earlier than toasting infuses the crumbs with an aromatic dimension.
Alternatively, a sprinkle of parmesan cheese or nutritional yeast after toasting provides a savory or umami note.
The careful balance of toasting, ingredient selection, and post-toasting additions elevate these gluten-free bread crumbs beyond a easy substitute, transforming them right into a flavorful and texturally satisfying part in a myriad of dishes.
Consider experimenting with totally different spices like garlic powder, onion powder, or paprika, for even more numerous taste profiles.
The prospects are infinite, allowing you to tailor the crumbs perfectly to enrich any recipe.
Storage and Usage
Creating gluten-free bread crumbs requires cautious consideration to storage and usage to take care of their quality and forestall spoilage.
Proper Storage Techniques:
The best storage methodology depends on the amount of crumbs and the length of time you intend to store them. For smaller portions used inside every week, an hermetic container at room temperature is adequate.
Larger batches or longer storage necessitate freezing. Freezing considerably extends the shelf life and preserves the texture and flavor of the crumbs. Before freezing, enable the crumbs to chill completely.
Use freezer-safe baggage or hermetic containers for freezing. Remove as much air as attainable from baggage to stop freezer burn, which can lead to a stale and less flavorful product.
Label the baggage or containers with the date of preparation to simply monitor freshness. Properly frozen, gluten-free breadcrumbs can final for as a lot as three months.
Refrigeration is an option, however it’s much less best than freezing for long-term storage. Refrigerated crumbs could be saved for approximately one to two weeks, however they might begin to lose some crispness and taste over time.
Avoid storing gluten-free bread crumbs in damp or humid environments, as this could lead to mold growth or clumping.
Usage Considerations:
For best outcomes, use gluten-free bread crumbs throughout the recommended storage timeframe. Older crumbs, even if frozen, would possibly exhibit some textural adjustments.
When using frozen crumbs, enable them to thaw utterly before incorporating them into recipes. This ensures even distribution and prevents pockets of icy crumbs in your dish.
Consider the type of recipe when selecting your bread crumbs. Finely floor crumbs are ideal for breading, while coarser crumbs present a greater texture for toppings or crusts.
If using breadcrumbs for breading, ensure that the meals is totally dry before coating to prevent excess moisture from making the crumbs soggy. A gentle coating of flour or cornstarch can even aid adhesion.
For recipes calling for recent breadcrumbs, make a batch specifically for that dish as an alternative of relying on stored crumbs. This guarantees optimum flavor and texture.
Experiment with different sorts of gluten-free bread to attain the specified taste and texture in your crumbs. Different breads yield different outcomes.
Remember to always follow good meals safety strategies when dealing with and storing breadcrumbs, as with every food merchandise. Regularly examine for indicators of spoilage, similar to mildew or off-odors, before utilizing.
Proper storage and usage methods are crucial for maximizing the standard and pleasure of do-it-yourself gluten-free breadcrumbs. By following these guidelines, you’ll be able to guarantee your breadcrumbs stay contemporary, flavorful, and ready to improve your culinary creations.
Gluten-free bread crumbs provide a flexible alternative to traditional breadcrumbs, enabling those with celiac illness or gluten sensitivities to take pleasure in a wide selection of recipes.
However, their storage and utilization differ slightly from their gluten-containing counterparts, necessitating a nuanced understanding for optimum results.
Storage: Proper storage is essential to maintaining the freshness and quality of gluten-free breadcrumbs. Airtight containers are paramount. Exposure to air results in staleness and potential moisture absorption, negatively impacting texture and flavor.
Consider using glass jars with tight-fitting lids or heavy-duty plastic containers with secure seals. Avoid flimsy containers or baggage that enable air to seep in.
Refrigeration is beneficial for extended storage, usually lasting up to 2 months if stored correctly. This helps decelerate the oxidation course of and prevents rancidity.
Freezing gluten-free breadcrumbs can also be a viable choice for longer storage, often extending shelf life to six months or longer. Freeze in hermetic freezer luggage, removing as a lot air as attainable before sealing.
Usage in Recipes: Gluten-free breadcrumbs can be used in a overwhelming majority of recipes that decision for normal breadcrumbs, however with some minor adjustments often needed.
Bread Crumb Replacement Ratio: Generally, a 1:1 substitution works nicely, but the texture would possibly differ slightly. Some gluten-free bread crumb blends could also be more absorbent than conventional breadcrumbs, so you could must add a bit extra liquid to your recipe, particularly when binding elements.
Binding Properties: Gluten-free breadcrumbs won’t bind as successfully as conventional breadcrumbs because of the absence of gluten. To enhance binding in dishes like meatballs or meatloaf, think about adding a binding agent such as egg, flaxseed meal, or chia seeds together with the breadcrumbs.
Toasted Breadcrumbs: To obtain a crispier texture, particularly in recipes like casseroles or as a topping for baked dishes, toast the gluten-free breadcrumbs before adding them to your recipe. This enhances their taste and creates a satisfying crunch.
Types of Gluten-Free Breadcrumbs: The kind of bread used to create the crumbs considerably impacts texture and flavor. Breadcrumbs made from a denser bread, corresponding to sourdough or a hearty artisan loaf, tend to carry their form better than those from lighter breads.
Experiment with totally different gluten-free bread types to seek out your preferred texture. Some brands specifically create bread for breadcrumb production, providing constant and optimal outcomes.
Making your personal Gluten-Free Breadcrumbs: Homemade gluten-free breadcrumbs provide complete control over ingredients and texture. Simply dry out gluten-free bread slices in a low oven or dehydrator earlier than processing in a meals processor.
Be cautious to not over-process, which may lead to a powdery consistency quite than fascinating crumb texture. Pulse the bread in brief bursts till you obtain the desired crumb measurement.
Recipes: Gluten-free breadcrumbs shine in a multitude of recipes. They work fantastically as coatings for fried meals, as a component in meatloaf and meatballs, as a topping for casseroles and gratins, and as a vital ingredient in lots of stuffing recipes.
Their versatility extends to breadcrumbs for stuffing vegetables, making schnitzel, creating crunchy toppings for soups and salads, and even thickening sauces and stews.
Remember to adjust cooking times as needed, as some gluten-free breadcrumbs might require a barely longer cooking time to achieve the desired crispness or browning.
By understanding the nuances of storing and utilizing gluten-free breadcrumbs, you possibly can confidently incorporate them into your culinary creations, making certain scrumptious and satisfying meals for everybody, regardless of dietary restrictions.
Creating gluten-free bread crumbs requires cautious attention to storage, usage, shelf life, and best practices to ensure optimal taste and texture.
Storage: Properly storing your gluten-free bread crumbs is crucial for maintaining quality. Airtight containers are important to prevent moisture absorption, which can lead to clumping and spoilage. Glass jars or plastic containers with tight-fitting lids are perfect. Avoid storing them in humid areas or close to sources of warmth.
Consider the quantity: For smaller amounts, small hermetic containers are excellent. For larger batches, consider using freezer baggage, squeezing out as much air as attainable before sealing. Freezing is a superb choice for long-term storage.
Usage: Gluten-free bread crumbs are extremely versatile. They can be utilized as a coating for meats, vegetables, and seafood, including texture and taste. They may also be integrated into casseroles, meatloaf, or used as a topping for soups and stews.
Remember to adjust the quantity used in comparison with traditional bread crumbs, as gluten-free crumbs may take up extra liquid. Start with a smaller quantity and add extra as needed to attain your desired consistency.
Experiment with various kinds of gluten-free bread to create distinctive taste profiles in your dishes. Using a food processor or blender for making your breadcrumbs lets you adjust the feel – for finer crumbs pulse extra, for coarser, pulse much less.
Shelf Life: The shelf life of gluten-free bread crumbs relies upon significantly on storage circumstances. Properly stored in an hermetic container at room temperature, they’ll final for up to six months. However, for optimum taste and texture, it’s best to make use of them inside three months.
Freezing extends the shelf life significantly. Frozen gluten-free bread crumbs can last for up to a year without vital loss of high quality. Always allow them to thaw fully earlier than using, and keep away from refreezing after thawing.
Best Practices:
- Start with fresh, high-quality gluten-free bread: The better the bread, the higher the crumbs.
- Dry the bread completely: Before processing, ensure your gluten-free bread is totally dry to stop clumping.
- Use a food processor or blender: This will provide you with consistent crumbs and save you effort and time.
- Adjust the texture: Pulse the bread within the processor till you reach your required crumb dimension. Coarse crumbs work nicely for coating, finer crumbs are higher for binding.
- Season your crumbs: Add herbs, spices, or parmesan cheese for further taste.
- Toast your crumbs: Toasting the breadcrumbs before using them enhances their flavor and creates a crispier texture. Spread them on a baking sheet and toast in a low oven until golden brown.
- Store correctly: As beforehand talked about, airtight containers and freezing are essential for maintaining quality.
By following the following tips for storage, utilization, shelf life, and best practices, you’ll be able to ensure that your selfmade gluten-free bread crumbs at all times ship distinctive results in your cooking and baking.

Recent Posts
- Why Gluten-Free Bread Requires More Hydration
- The Role Of Time In Fermenting Gluten-Free Dough
- The Environmental Impact Of Gluten-Free Bread Ingredients
- Exploring The World Of Gluten-Free Bagels
- Secrets To Creating Gluten-Free Bread Crumbs
- The Role Of Salt In Gluten-Free Bread Dough
- Cultural Variations Of Gluten-Free Bread Around The World
- Common Mistakes In Gluten-Free Baking
- How Gluten-Free Bread Impacts Health
- How To Choose A Gluten-Free Bread Recipe For Beginners
- How Gluten-Free Bread Works For Paleo Diets
- Can Gluten-Free Bread Ever Taste Like Regular Bread
- Why Gluten-Free Bread Is Popular Beyond Health Reasons
- How Gluten-Free Bread Is Evolving In The Food Industry
- How Gluten-Free Bread Can Be Part Of A Balanced Diet
- The Role Of Protein In Gluten-Free Bread